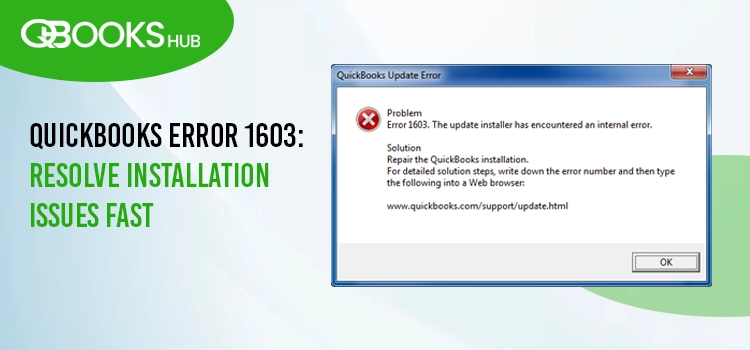
QuickBooks is an extraordinary accounting solution that is used to manage day-to-day business financial operations. However, before running the QuickBooks Desktop application, you must install it on your device. However, most often, users might report QuickBooks Error 1603 when they install QuickBooks Desktop. Along with this, it flashes the message on the screen indicating: “The update installer has encountered an error.” Users often get stuck with this error when the security policy on the computer is enabled. It could also arise due to problems associated with the installation of the .NET Framework.
Unfortunately, Error 1603 QuickBooks not only prevents you from accessing the application but also interrupts you from performing ongoing business tasks. Read the entire post attentively and find the most suitable solutions to rectify the installation error 1603 in QuickBooks.
QuickBooks Error Code 1603 – A Quick Overview
Users often experience QuickBooks Error Code 1603 during installation or when they try to open the application after installation. It could happen when there are some issues with installing a software package because of problems with either the Windows installer or the software package. Unfortunately, this error prevents you from installing the QuickBooks Desktop, resulting in a delay in ongoing business tasks. Following are the error messages that the users might encounter during the arrival of the error.
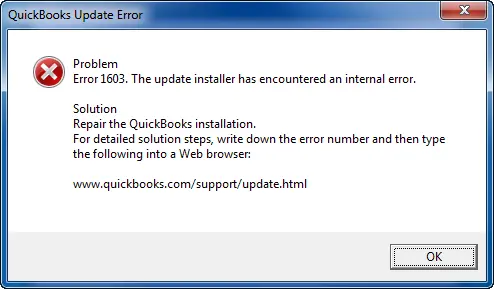
- “Error Status 1603: Unable to apply the patch.“
- “MSI Returned 1603: Fatal Error during installation“
- “Install Error 1603: There was a problem installing Microsoft .NETFramework“
Reasons Why Users Encounter QuickBooks Installation Error 1603
QuickBooks Installation Error 1603 is often experienced by users due to the damage or corruption in the QuickBooks installer. In other instances, there are several reasons that might cause this error. Let’s have a quick look at all the root causes and understand the issue properly.
- Conflict with the Windows Firewall or third-party security applications.
- It could be possible that the Microsoft.NETFramework failed to install properly, or it is corrupted.
- Problems at the end of the Windows Installer could also be another reason behind the occurrence of QuickBooks Error Code 1603.
- In other cases, the issue may arise when the Windows Registry does not have a valid entry.
- Incomplete or damage in the installation of the QuickBooks Desktop file is also responsible.
- Problems associated with network connectivity might prevent users from installing the latest version of QuickBooks Desktop.
- Sometimes, the issue may arise when you are unable to meet the system requirements to install the QuickBooks Desktop on your device.
- Improper Windows User Account permissions might also prevent the users from installing QuickBooks on the device.
Signs to Identify QuickBooks Update Error 1603 on Your Screen
Herein, we have disclosed all the signs and symptoms that will help you determine the occurrence of QuickBooks Update Error 1603.
- Failure to install the QuickBooks Desktop application might restrain you from accessing the company file.
- You may observe that the QuickBooks Desktop installation task might get interrupted midway through the process.
- There might be the possibility that when the QuickBooks Error 1603 appears, it starts crashing or shutting down the QuickBooks application.
- Some important QuickBooks-related files get removed from the list due to the Error Code 1603 QuickBooks.
- In other cases, you may see sudden freezing of your active Windows operating system.
Effective Solutions to Fix QuickBooks Update Error 1603 During Installation
After understanding everything that causes QuickBooks Update Error 1603 when installing QuickBooks Desktop, it’s time to fix the issue. For that, we have illustrated all the troubleshooting methods that you can use to easily rectify the error without making much effort.
Solution 1: Take Help of the QuickBooks Install Diagnostic Tool
The best way to deal with installation issues such as QuickBooks Error Code 1603 is by running the QuickBooks Install Diagnostic Tool. However, to run this tool, you first have to set up QuickBooks Tool Hub by downloading it from the official Intuit website. Then, get it installed using the instructions provided on the screen. Furthermore, follow the steps for using the Install Diagnostic Tool.
- Initiate the process by opening QuickBooks Tool Hub and then head to the Installation Issues tab.
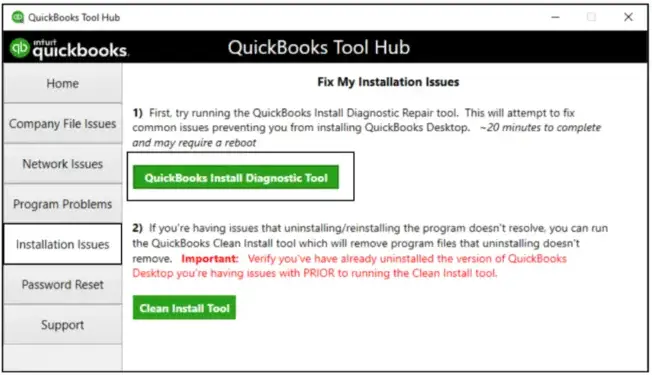
- After that, opt for the QuickBooks Install Diagnostic Tool and allow the tool to run successfully on your device.
- Once the tool finishes diagnosing and fixing the issue, relaunch your computer to see if the Error Code 1603 QuickBooks still exists.
Solution 2: Ascertain That Windows Is Updated to the Latest Version
At times, the users might end up with the QuickBooks Update Error 1603 due to the outdated version of Windows. So, to rectify the issue, it is mandatory to update the Windows by performing the following steps.
- If you are a Windows 11 user, then switch to the Start menu and click the Settings option.
- After that, navigate to the Windows Update option, and it will eventually start installing the latest Windows update.
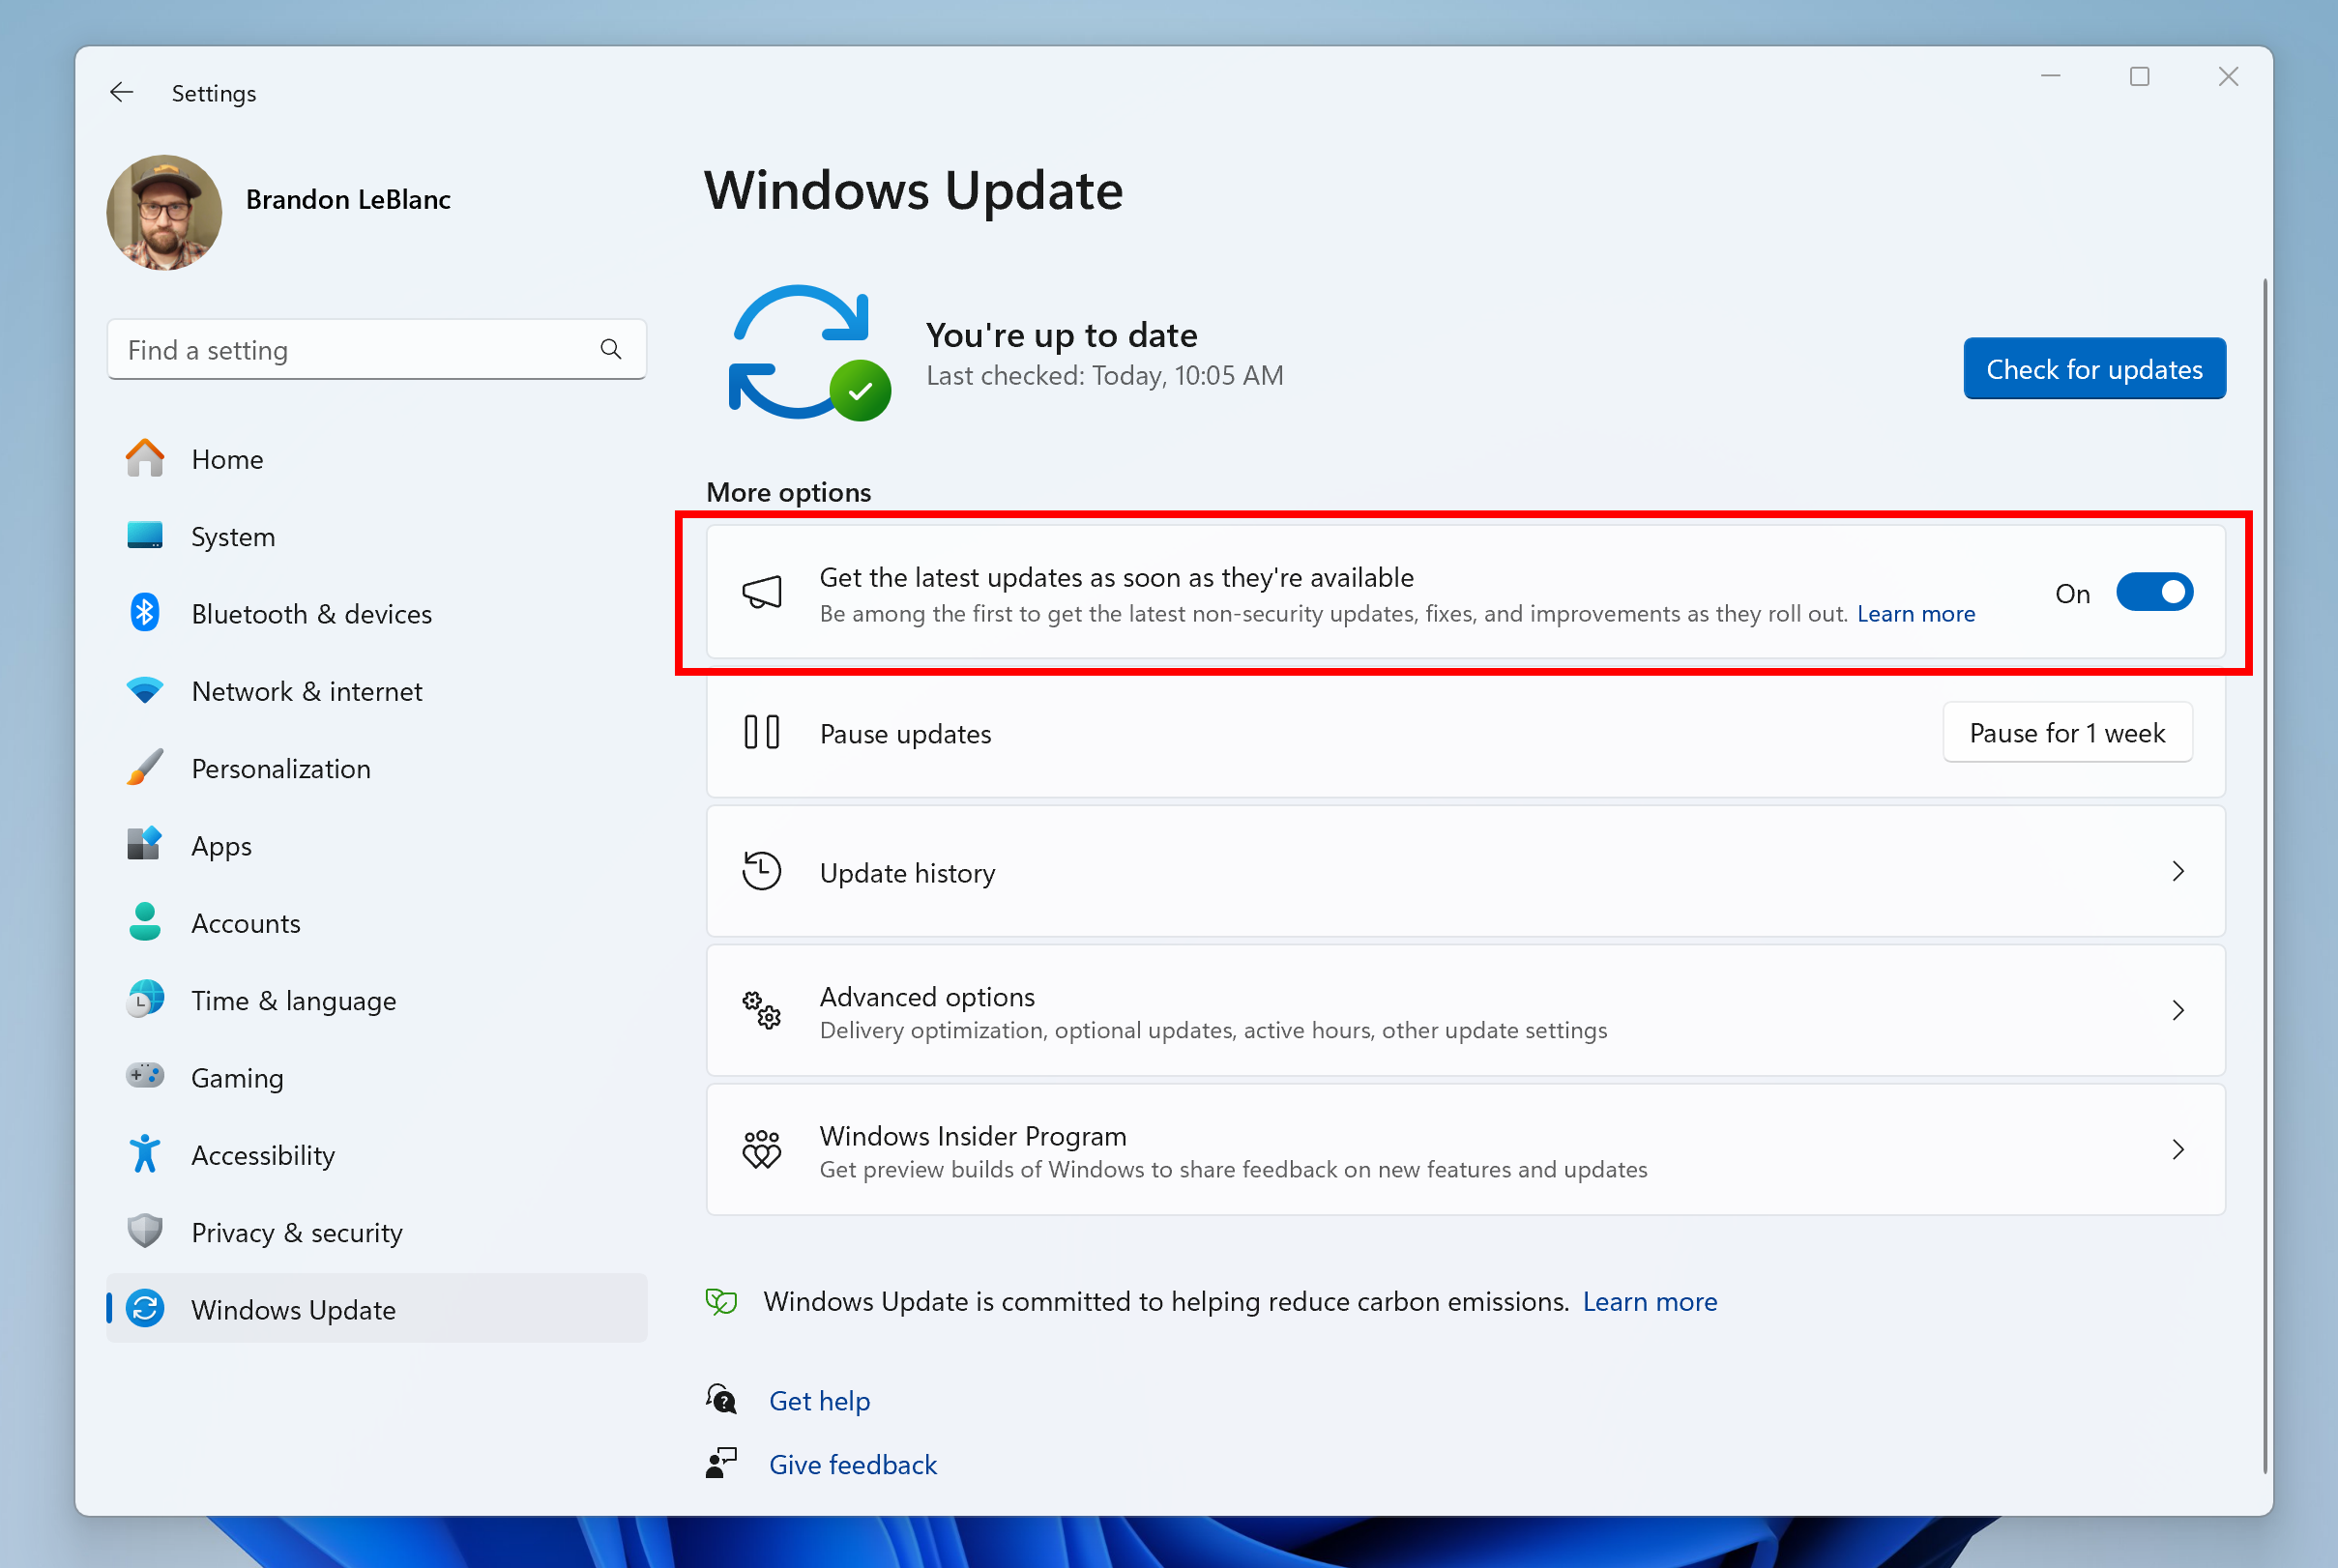
- Once you are done installing the Windows update, you must relaunch your computer.
- Now, if you are able to launch the QuickBooks application before seeing the QuickBooks Error 1603, then open QB and then your company file.
- If you fail to get the QuickBooks Desktop installed on your device, try installing it once again.
Solution 3: Configure the Damages Present in the Microsoft MSXML Components
Damage or corruption in the Microsoft MSXML components could also be responsible for the occurrence of QuickBooks installation error 1603. Therefore, to repair the damages with the Microsoft component, follow the procedure below.
Functions to Perform on the 64-bit operating system
- Press the Windows logo key to bring up the Start menu and insert “cmd” in the search panel.
- Thereon, right-click on the cmd file and then hit the Run as Administrator option.
- When you get the Command Prompt wizard, insert “cd\windows\syswow64” and press the Enter key.
- In the upcoming window, include “regsvr32 MSXML6.dll” and tap on the Enter key again.
- Finally, try installing the latest version of QuickBooks Desktop on your workstation.
Functions to Perform on the 32-bit operating system
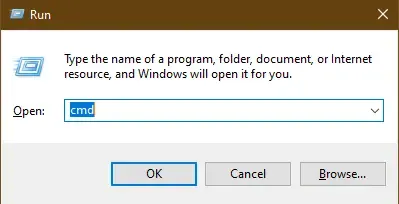
- Begin the process by launching the Run command window using the shortcut keys Windows + R.
- In the Run window’s search panel, insert “cmd” and then click on the OK tab to open the Command Prompt wizard.
- Now, in the black colour window, give the command “regsvr32 MSXML6.dll” and hit the Enter key.
- Conclude the entire process by installing the QuickBooks Desktop application again on your device to check the error status.
Solution 4: Installation of the QuickBooks Desktop in Selective Startup Mode
There are times when users get interrupted while installing QuickBooks Desktop due to the blockage of third-party apps, including antivirus or anti-spyware programs. Therefore, to prevent the app from any interruption during the installation, try installing it in selective startup mode. Use the steps below to install the QBDT in selective startup mode.
- Before beginning the process, ensure that you have created the backup of the QuickBooks company file. Also, it is necessary to keep the QuickBooks Desktop product and the license details as it may require further during the setup.
- After this, access the Run window and include “msconfig” in the search console.
- Now, move to the General tab and click on the Selective Startup and Load System services tab.
- Thereon, head to the Services tab and ascertain that the checkbox of “Hide all Microsoft Services is selected” is marked.
- Once the changes are implemented, click the Disable All tab and keep the Hide All Microsoft Services checkbox unmarked.
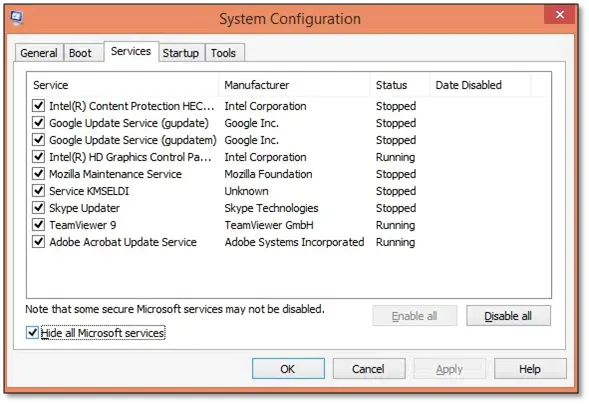
- Afterwards, choose the Windows Installer from the services list and then tap the OK button.
- When you are on the Configuration window, move to the Restart option.
- Later on, try re-installing QuickBooks Desktop and then launch the Run window.
- After reaching the Run window, include “msconfig” and hit the OK tab.
- Once again, switch to the General tab and then click the Normal Setup option.
- Finally, click the OK tab, and when you reach the System Configuration window, hit the Restart option.
Solution 5: Modifying the Windows Security Settings Manually
At times, Windows compromises certain policies, which might obstruct users from downloading third-party applications. However, making slighter changes within the Windows Local Group Policies might help rectify the QuickBooks Error 1603.
- Initially, the users must log in to the computer with the proper administrative credentials.
- If you don’t have enough access to the Windows Administrator account, you might ask the IT experts for help.
- Afterwards, launch the Run window, insert “gpedit.msc” command in the search console and hit the Ok tab.
- Now, you must browse to the Administrative Templates section, which is present beneath the Computer Configuration section.
- Afterwards, navigate to the Windows Components, then click the Windows Installer, followed by the Prohibit User Installs option.
- Later on, double-tap on the policy to make the modifications and mark the checkbox Not Configured.
- Finally, tap on the OK tab and try installing the QuickBooks again to see if the issue is resolved.
Concluding This Post!!
Through this comprehensive guide, we assure you that you can now easily resolve QuickBooks Error 1603 by applying the solutions explained in this post. Thus, it will help you install the QuickBooks Desktop application smoothly without any interference. Furthermore, if you still require any additional help, feel free to communicate with our QB professionals for quick resolution at +1-866-409-5111.
Frequently Asked Questions
Ans. Before fixing the QuickBooks Error 1603, it is advised to keep the following things in mind.
- Make sure that your system is linked to smooth and uninterrupted network connectivity throughout the installation of QuickBooks Desktop.
- Also, verify that the firewall and the third-party security applications won’t create any disturbance during the installation.
- Moreover, check that you are using the updated version of Windows.
- Besides all, the users mustn’t forget to create a backup of the company file.
Ans. No, the QuickBooks Error Code 1603 won’t cause any damage to the company file data. It is only an installation error that prevents users from getting the latest version of QuickBooks. But, for the safer side, it is necessary to create a backup of the file to prevent any data loss or damage.
Ans. Whenever users come across QuickBooks Error 1603, they are prevented from installing the latest QuickBooks Desktop or updates on their workstation. It also creates trouble while doing ongoing business tasks, which might result in delays in the work.
Ans. Yes, updating the QuickBooks Desktop to the latest version regularly is important to run the software seamlessly without any issues.
Ans. To restore the lost or damaged QuickBooks company file data, you can use the backup file if you have one. Otherwise, you can use the QuickBooks auto data recovery tool to recover the old data.

