How to Fix QuickBooks Error 400: HTTP Bad Request?
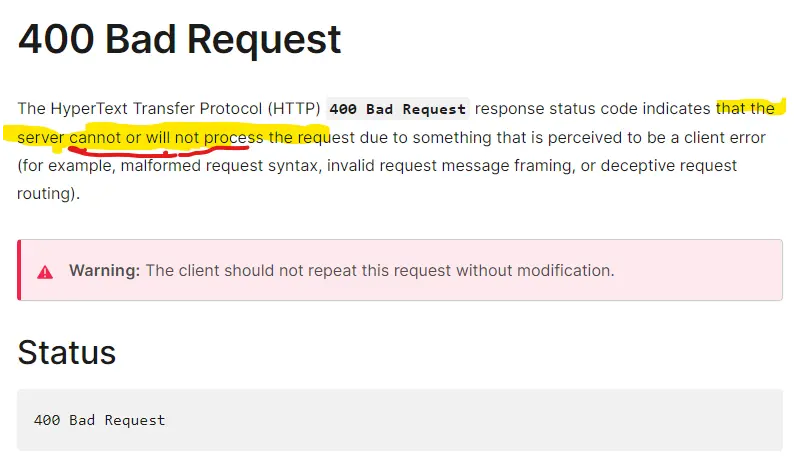
QuickBooks might display an Error 400: HTTP Bad Request when trying to connect to your bank. This happens when the server is unable to process the request being sent due to an unknown issue perceived by the server, mainly when it’s corrupted.
You may see different error messages on your screen:
“QuickBooks Error 400: The remote server returned an error – Bad Request.”
Let’s explore the possible reasons that interrupt the bank connection and the resolving steps for QuickBooks Error 400: HTTP Bad Request.
What Triggers HTTP Bad Request Error 400 in QBO?
The HTTP 400 Bad Request error in QuickBooks Online typically occurs due to issues with the request sent to the server. Here’s a breakdown of the triggers in the below section:
- The bank server might not be working
- The connection between QuickBooks and your financial institution is interrupted
- Excessively stored cookies and caches in QuickBooks Desktop
- You might be using an incompatible browser
- Intuit might not be added as a trusted site on your browser
Read More- Create QuickBooks Antivirus Exclusions
Fixing the Banking Error 400 Http: Bad Request in QuickBooks Online
To fix the HTTP Error 400: Bad Request in QuickBooks Online when connecting to your bank, follow these steps, starting with checking your bank’s website, followed by additional troubleshooting methods.
1. Check your bank’s website
A 400 error indicates that QuickBooks cannot connect to the server. First, verify if the bank’s server is operational.
Visit your bank or credit card’s website and attempt to log in. If login is successful, proceed to the next troubleshooting step.
If the bank or credit card server is down, wait for the issue to be resolved. You may also contact their support for additional details.
Learn more- QuickBooks Online Bank Reconciliation
2. Refresh the connection between QuickBooks and financial institution
Consider refreshing the QuickBooks connection with the financial institution, this will help you restore the connection to maintain up-to-date financial records and accurate reporting. First, disconnect the account and reconnect it to refresh:
a. Disconnect an account
- Go to Transactions in QBO and choose Bank transactions.
- Choose the file for your bank account.
- Click on the edit icon and then select Edit account info.
- Mark the checkbox for Disconnect this account on save.
Note: This option won’t appear while QuickBooks is downloading fresh transactions. Give the update a few minutes to complete, then try again.
- Click on Save and Close.
b. Connect your QuickBooks and bank again
- Navigate to Transactions and choose Bank transactions from the drop-down.
- Click on Link Account.
- You can choose a bank from the list or search for your bank by name or URL.
Note: You can manually upload transactions if you are unable to locate your bank.
- Hit on Continue.
- In pop-up window, sing in to your bank account.
- From the drop-down, choose the dates to pull transactions and the account you wish to connect to. Then, click Next.
Note: You can obtain the transactions from the previous ninety days from certain banks. Some can trace back up to 24 months.
- Select the account type that matches with the chart of accounts in QuickBooks from the Account type drop-down and then click Next.
- Choose either Bank or Credit Card to connect from the Account Type drop-down. If you select Bank Account, in Detail Type, click on Savings or Checking.
- Name your account and click on Save and Close.
- Map your bank account in the Existing accounts drop-down and click Next.
- Hit Connect and select Done.
- Move back to the Bank Transactions screen, select Update. This will automatically download your bank transaction.
3. Open QuickBooks in Incognito window
Incognito window or private browser allows you to browse anything without saving your preferences or search history. No cookies, cache or stored preferences can disrupt the bank connection while downloading transactions.
- Mozilla Firefox / Internet Explorer: CTRL + Shift + P
- Safari browser (For Mac Users): Command + Shift + N
- Google Chrome: CTRL + Shift + N
4. Clear your browser’s cache
The cookies and caches stored on your browser save your history in files and save the history to load the websites faster on your previous visit. By the time these files expire, it can hamper the browser functioning of your workflow. Clear the excessively stored cookies and caches on your browser to ensure you no longer see the QuickBooks error 400: HTTP bad request when downloading bank transactions.
5. Use other supported browsers
The browser you currently use to access the bank’s website might not be compatible with your software. Here is a list of browsers that are supported by QuickBooks for accounting and financial management processes:
- Google Chrome: version 78 or newer
- Mozilla Firefox: version 76 or newer.
Note: You will also need the Firefox PDF plugin in order to preview and print forms on Mac OS.
- Microsoft Edge: version 79 or newer
- Safari: version 12 or newer (Mac only)
- Opera: version 68 or newer
- Samsung: version 10 or newer
6. Add Intuit as a Trusted site
A trusted site is encrypted and secure and has a certificate that updates the browser to ensure that all the content, images, or information used on the website is original and doesn’t harm your computer. This way, the browser allows all web processes to run without any interruptions.
Add Intuit as a trusted site to your browser by following these steps:
Google Chrome
- In Google Chrome select the Customize and control ⋮ icon and choose Settings.
- Choose Privacy and security from the left pane and then click on Third-party cookies.
- Select Add next to Allowed to use third-party cookies.
- Type intuit.com, then select Add to save.
Safari
- Launch the Safari browser, then enter intuit.com.
- Click on Enter.
- Choose Bookmarks, then click on Add Bookmark…
- From the under Add this page to: drop-down, select Favorites.
- Finally, click on Add.
Microsoft Edge
- Go to Settings and more … icon, then select Settings.
- Select Cookies and site permissions from the left pane, then click on Manage and delete cookies and site data.
- Select Add in the Allow section.
- Type intuit.com, then click on Add to save.
Also Read- QuickBooks Internet Connection Error Read Error
Workaround: Manually upload your transactions
If you fail to resolve error code HTTP 400 in QuickBooks, consider manually uploading your transaction to continue with your accounting management, or you can contact QuickBooks experts for help.
a. Pick a start date
You must know the date of the oldest transaction that is currently in the account in order to prevent inputting duplicates:
- Navigate to Chart of accounts.
- Open the link in a window.
- Look for the account you want to upload the transactions into then click View register.
- Determine which transaction is the oldest, then note the date.
Note: The opening balance is often the oldest transaction.
b. Get transactions from your bank
You must download CSV files of your transactions in order to obtain them from your bank.
- Sign in to your bank or credit card website.
- Follow the instructions on your bank account to download the CSV files of your transactions to your computer.
Note: Every financial institution has different steps. Here are steps for Bank of America, Chase, and Wells Fargo.
- Check or select the date range to download the transaction. It must occur at least one day prior to the date of your most recent transaction.
- Get your transactions by downloading them. Save the file to a convenient location, such as the desktop of your computer.
| Tip: A few file types might be available from your bank. Choose the QuickBooks Online data (QBO) format if at all possible. These have been specially designed for QuickBooks Online. Transactions from a CSV or Quicken (QFX) file can also be uploaded. |
c. Review the file format and size
Before uploading, ensure the file downloaded from your bank is in the correct format. To prevent errors, verify the following:
Note: The maximum file size is 350 KB. If the file is too large, reduce the date range and download transactions in smaller batches.
- Remove all zeros (0) from the file, leaving those cells empty.
- Correct any transactions with numbers in the Description column.
- Rename the column headers by removing the word amount so they read only Credit and Debit.
- Ensure all dates are in a consistent dd/mm/yyyy format.
- For Mac users, save the file as a Windows CSV file.
- If the Date column includes the day of the week (e.g., 20/11/2018 TUE), remove the day of the week by splitting the date and day into separate columns.
d. Manually upload the transactions
- Select Bank Transaction and then open this link in a new window.
- Choose the account tile you want to upload the transactions into.
- Select Upload from file in the Link account drop-down.
Note: If your account isn’t linked to online banking yet, choose the Upload from file option.
- Click on Drag and drop or select files and choose the file you just downloaded from your bank. Then, click Continue.
- Choose the account you want to upload the transactions into in the QuickBooks account drop-down and click Continue.
Note: If you’re new to QuickBooks, you may not have an account to upload the transactions into. If you don’t see one, select Add New from the drop-down to create a new bank account.
- Follow the onscreen instructions to align the file’s columns with the appropriate fields in QuickBooks, then click Continue.
- Choose the transactions you want to import, then click Continue.
- Select Yes, then Done.
e. Categorize transactions
Once your transactions are imported into QuickBooks, you need to match and categorize them. After reviewing, the transactions will be assigned to your accounts.
QuickBooks Online can automatically fill in certain details if you’ve set up banking rules or if it recognizes transaction descriptions.
Summary
We’ve reached the end of this blog, which provides a detailed overview of why connecting your bank to QuickBooks Online is essential. We’ve also included step-by-step instructions to resolve any related errors quickly. We hope this information has equipped you with everything you need to overcome errors and manage your banking processes in QuickBooks Online seamlessly.
For further assistance, we recommend connecting with a QuickBooks professional. Dial our toll-free number +1(866)409-5111 to speak with an expert now!
Frequently Asked Questions
QuickBooks shows HTTP status 400 due to invalid requests, often from incorrect URLs, corrupted data, or server issues. Ensure proper internet connection, clear browser cache, and verify login credentials.
Error code 400 on Intuit indicates a bad request, typically due to invalid data, server miscommunication, or outdated software. It often occurs during login or data sync. Update QuickBooks, check internet stability, and verify account details to resolve.
Error 323 in QuickBooks occurs when duplicate bank accounts are detected during bank feed setup. It prevents syncing due to conflicting accounts. Review and merge duplicate accounts in the chart of accounts or disconnect unused accounts.
Error 400 payment in QuickBooks arises during payment processing due to invalid payment details, server issues, or outdated software. Verify payment information, ensure a stable internet connection, and update QuickBooks. Contact Intuit support for persistent issues.
To fix QuickBooks Error 400, update the software, clear browser cache, and check internet connectivity. Verify login or payment details and try again. If unresolved, contact Intuit support for assistance with server or data issues.

