QuickBooks Multi User Mode Not Working When Hosting [Fixed 2026]
QuickBooks’ multi-user mode allows multiple team members to access a company file simultaneously over a network, enhancing collaboration and efficiency. However, encountering issues like QuickBooks multi-user mode not working can halt productivity, leaving teams frustrated. Common culprits include network glitches, misconfigured settings, or software conflicts.
In this blog, we’ll dive into the causes behind these errors and guide you through practical steps to troubleshoot and restore seamless multi-user access, ensuring your business operations run smoothly.
QuickBooks Multi-User Mode Related Error Codes
Although failure to host a company file is a single issue, it can stem from various causes, occurring during hosting, opening, or working. You may see different error codes on the screen indicating the problem.
Here is a list of possible errors that typically appear when the multi-user connection is disrupted:
| QuickBooks Multi-User Mode Errors | ||
| QuickBooks Error H101 | QuickBooks Error H202 | QuickBooks Error H303 |
| QuickBooks Error H505 | QuickBooks Error 6073 | QuickBooks Error 6175 |
| QuickBooks Error 6190 | Some QuickBooks Error 6XXX | |
Why is QuickBooks Multi-User Mode Not Working?
Let’s look at what exactly interrupts the connection and produces various errors when hosting a company file in QuickBooks Desktop:
- You might not be running QuickBooks Database Server Manager.
- Data damage in the company file or common network issues.
- The QuickBooks Windows services might not be running or might lack the necessary Windows permissions.
- The server and workstation might not be properly connected.
- Incorrect hosting settings.
- The Windows Firewall might be blocked due to incorrect settings.
- Incorrect or damaged installation.
Top 8 Solutions to Fix the Multi-User Mode Not Working in QuickBooks
When you fail to open a company file in multi-user mode, you might see QuickBooks error H202, error H303, or other problems. The section below is suitable for helping you quickly address the error or problems.
1. Run QuickBooks Database Server Manager
QuickBooks Database Server Manager lets you host the company file on the network. You must have access to run a tool on your server.
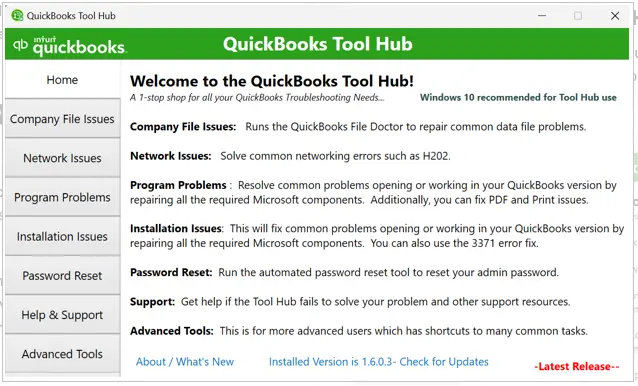
a. Download and Install QuickBooks Tool Hub
QuickBooks Tool Hub, in its most recent version, allows you to access multiple utilities to address the ongoing issues. Be sure to download and install QuickBooks Tool Hub 1.6.0.8, its most recent version, on Windows 10, 64-bit, to get the best out of it.
b. Run QuickBooks Database Server Manager
- From the right panel of the Tool Hub, tap on Network Issues.
- Select QuickBooks Database Server Manager.
- If you see your company file folders in the utility, choose Start Scan.
- Running the tool will automatically fix the Windows firewall issues. Once the scan finishes, click Close.
- Open QB on your server computer to ensure Switch to Multi-user Mode is selected under the File menu. If you are using a workstation as a server, be sure to check it too.
c. Run QuickBooks File Doctor
- From the right menu bar, click on Company File Issues.
- Tap on Run QuickBooks File Doctor. This tool can take some time; be patient until then.
- Now, choose your company file from the drop-down menu or simply Browse it from the file folder.
- Click on Check your file and Network, and Next.
- Hit Next after entering the QuickBooks admin password.
Try again to switch QuickBooks to multi-user mode and ensure H202 is fixed. Otherwise, continue moving to the next solution.
2. Scan the Folder Using QuickBooks Database Server Manager
You need to scan your company file using QuickBooks Database Server Manager to ensure it allows the company file to work with other computers on the network.
- On your server computer, click the Windows Start menu.
- Type Database in the search field and then press “Open QuickBooks Database Server Manager.”
- In the window, move to the Scan Folders tab.
- Select Browse and then locate the QuickBooks company file folder.
- Hit OK once you’re done.
- Finally, select Start Scan to let Database Server Manager scan your files.
After the scan, you will see a folder in the QuickBooks company files found section. Now, you can access the company files in these folders on your network without any hassle.
3. Ensure the Services are Running on Your computer
Follow the instructions provided below to ensure the QuickBooksDBXX service is running, and then repeat the process for QBCFMonitorService.
- Launch the Windows Start.
- Type Run, press Enter.
- Type services.msc and click OK.
- Look for the QuickBooksDBXX service and then double-click on it.
- Set Automatic for Startup Type.
- The service should be either Running or Started. If it’s neither, hit Start.
- Go to the Recovery tab.
- From each of the drop-downs: First failure, second failure, and Subsequent failure, select Restart the Service.
- Apply the changes and OK to save.
- Consider following the same steps for QBCFMonitorService.
Still facing the multi-user mode not working in the 2023 version of QuickBooks? Follow the next solution.
4. Add Services to the Windows Admin Group
Having the right administrative rights to Database services is necessary to ensure that required changes can be made to your computer for an uninterrupted workflow.
- In File Explorer, find the QuickBooks file folder and right-click on it.
- Click on Properties.
- Choose Advanced from the Security tab.
- Tap on QBDataServiceUserXX and hit Edit.
- Set these settings to Allowed:
- Traverse Folder/Execute File
- List Folder/Read Data
- Read Attributes
- Read Extended Attributes
- Create Files/Write Data
- Write Attributes
- Write Extended Attributes
- Read permissions
If the permissions are not correct:
- Right-click the company file folder.
- From the drop-down menu, click on Properties.
- Click on Edit from the Security menu.
- Select QBDataServiceUserXX and set the Full Control for it. Then, Allow the settings.
- Now, apply the settings and then click OK.
Change the folder permissions if required:
- Launch the File Explorer.
- Find the folders below and then right-click on each:
- C:\Program Data\Intuit\Entitlement Client\v8
- C:\Program Data\Intuit\Entitlement Client\v6.0
- C:\Program Data\Intuit\Entitlement Client\v5
- C:\Program Data\Intuit\Entitlement Client\v3
- C:\Program Data\Intuit\Entitlement Client
- C:\Program Data\Intuit\QuickBooks Enterprise Solutions X.0 (X = version) or C:\Program Data\Intuit\QuickBooks 20XX (XX = year)
- C:\Program Data\COMMON FILES\INTUIT
- C:\Program Data\COMMON FILES\INTUIT\QUICKBOOKS
- C:\Users\Public\Public Documents\Intuit\QuickBooks\FAMXX (XX = year)
- C:\Users\Public\Public Documents\Intuit\QuickBooks\Company Files
- C:\Users\Public\Public Documents\Intuit\QuickBooks\Sample Company Files\QuickBooks Enterprise Solutions X.0 (X = version) or C:\Users\Public\Public Documents\Intuit\QuickBooks\Sample Company Files\QuickBooks 20XX (XX = year)
Now, perform the steps listed below for the above folders:
- Right-click your company file folder and choose Properties.
- Choose “Everyone” from the Security tab.
Note: If you don’t see Everyone in the chat, tap on Add and type in Everyone. After that, click OK.
- Hit on Full Control and then Apply the changes.
- Click OK.
Set the Access Permissions to Share Company Files for Windows 10
- Press the Windows+E keys together to launch the File Explorer on your computer.
- Locate the QB company file folder and right-click on it.
- Click on Properties and Sharing. Then, tap on Share Add.
- Select the corresponding QBDataServiceUserXX for your version.
- Now, set the permission of both users to Full Control and hit Share.
If the company file is accessible on the network, you’re good to go. Otherwise, proceed with the next solution.
5. Switch to Multi-User Mode
If your server computer is in single-user mode, switch it to multi-user mode by following the steps below:
- Open QB on any workstations you are facing.
- From the top menu bar, click on the File menu.
- If you find the Host Multi-User Access as an option, avoid it.
- Move to the next workstation and consider following the same steps. Now, if Stop-Hosting Multi-User Access is an option, select it.
- Repeat all these steps on each of your workstations and ensure multi-user mode is working.
Once the process is done on each of the workstations, go to your server computer and then perform the steps mentioned below:
- Launch QB Desktop on your server computer.
- Click on File at the top menu bar and then Utilities.
- Only select if Host Multi-User Access. Otherwise, proceed with the next solution.
6. Configure the Windows Firewall Settings
The Windows Firewall is a security app that controls the incoming and outgoing traffic on your device. If it detects QuickBooks as a threat to your computer, the Windows Firewall blocks the applications and all of its programs. To run your operations without interruptions, you must configure the Windows Firewall settings for QuickBooks.
7. Ping Your Server from a Workstation
The ping function between a server and a workstation can help you determine whether a system is online and capable of communicating with other computers over the network. Let’s ping your server from a workstation by following the steps below:
Before you even start, turn on network discovery on the computer where you encounter the error.
- Open the Windows Start menu and type Network.
- Choose Network and Sharing Center.
- Tap on the Change advanced sharing settings option.
- Ensure Turn on network discovery is selected in the Network Discovery and File and Printer sharing sections.
Now, get the server name from your server:
- Open the Windows Start menu.
- In the search field, type Run and press the Enter key.
- Type CMD in the Run prompt and click OK.
- Type ipconfig/all in the CMD window and press Enter.
- Move to the Windows IP Configuration section and find the Host Name.
- You will find the server name on the right side.
- Write down the hostname or save it in Notepad.
Move back to the workstation and then test the server. It is recommended that you contact an IT expert, as the steps might be complex to follow.
- Hit the Windows logo key on your keyboard to open the Windows Start menu.
- Type Run in the search field and then hit Enter.
- In the Run prompt, type CMD and then press Enter.
- Note down “ping [your server name],” without brackets, and then press Enter.
- Proceed with the same steps on each workstation.
The connection between the workstation and server works fine, but QuickBooks multi-user mode still does not work in Windows 11. Try the next solution.
8. Reinstall QuickBooks
Reinstalling QuickBooks refreshes the program and addresses any associated problems or errors. The process involves removing and replacing all the program files with the new ones.
Let QB Database Server Manager scan your company file folders if your QuickBooks program is working well.
Conclusion
Accessing multi-user mode in QuickBooks allows you to streamline workflows, reduce errors, save time, and collaborate seamlessly with your team in the company file. If you’re experiencing issues with QuickBooks Desktop multi-user mode or facing network connectivity problems, the information provided above should help you identify and resolve them.
Frequently Asked Questions
You may fail to switch to multi-user mode in QuickBook due to several reasons such as incorrect hosting settings, Firewall or antivirus interference, problems with the Database Server Manager, or problems with Windows file permissions. It’s also possible that QuickBooks isn’t installed on the server or that the company file is corrupted.
To resolve QuickBooks Enterprise Multi-User problems, ensure a proper hosting setup and network connectivity. Check multiple host computers, shut down hosting on all workstations except the server, and restart QuickBooks services on the server. Verify firewall settings and consider using QuickBooks File Doctor or QuickBooks Tool Hub to diagnose and repair problems.
To enable multi-user collaboration in QuickBooks Desktop, switch to multi-user mode, host your company file on a network, and share access with your team. Ensure QuickBooks Database Server Manager is running to facilitate the connection.
To fix QuickBooks stuck in single-user mode, you need to ensure that all users are logged out and then switch to multi-user mode through the File menu. Don’t forget to run QuickBooks Database Serve Manager for a seamless experience with multi-user mode, and check network connectivity and firewall settings.
QuickBooks Desktop can perform slowly in multi-user mode due to a number of factors related to the network, server and company file size. Network connectivity, hardware limitations on the server or workstation, large company files and multiple users accessing the file simultaneously can all contribute to performance problems.

