How to Resolve QuickBooks Requires That You Reboot Loop Issue?
Stuck in an endless cycle of restarts with QuickBooks? The “QuickBooks requires that you reboot loop” is a frustrating error that many users encounter. It’s that moment when QuickBooks keeps asking you to reboot your computer, no matter how many times you’ve already done it. This common issue can halt your productivity and create a stressful situation.
This relentless loop often points to deeper problems like corrupted updates, damaged system files, or conflicting software on your PC. In this article, we’ll explore why this happens and provide a clear, step-by-step guide to help you break free from the reboot loop and get back to managing your finances smoothly.
Why is QuickBooks Stuck to Reboot or Not Working?
You may get stuck at ‘QuickBooks requires that you reboot loop’ or fail for several reasons. The primary causes are often related to insufficient permissions, corrupted files, and others which are discussed below:
- The update you are trying to install does not have the proper admin rights
- The Windows OS you use is not up-to-date
- Your existing Windows user account is corrupted
- The name of your company file might be too lengthy
- Possible corruption or virus infections on your computer’s hard disk
- The QBWUSER.INI file is either damaged or missing
- Incorrect security permissions in the Windows Temp folder
- Possible corruption of the Microsoft .NET Framework, damage or it might be missing
- The Windows Firewall might not be configured properly for QuickBooks
- Incorrect or corrupted installation of QuickBooks Desktop
- Third-party services might be hampering with common QB processes
Top 12 Methods to Fix the QuickBooks Requires That You Reboot Loop Issue
If you’re stuck in a QuickBooks requires that you reboot loop, it means the application repeatedly prompts you to install an update that has either failed or is already installed. Proceed with the advanced troubleshooting steps, ensuring that you can update, open, and run QuickBooks without getting stuck in a loop:
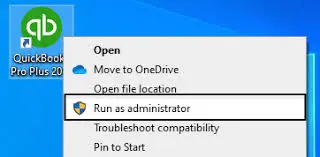
1. Update QuickBooks Desktop with admin rights
If QuickBooks Desktop prompts you to reboot your computer just after finishing the restart, it means you are stuck in a loop. Not having the proper admin rights to your update might prevent the software from writing necessary changes to your system’s registry and installing files, and continue to prompt for the update. Make sure to download the QuickBooks update with admin privileges and admin permissions to enjoy a seamless user experience.
2. Update Windows OS
An outdated Windows OS often causes incompatibility with the software running on your computer, such as QuickBooks Desktop. Perform the steps below to update your Windows OS to the latest release:
- Open the Windows Start menu.
- Type Settings and press Enter.
- Select Windows update from the left pane.
- Now, click “Check for updates.”
- If it indicates that updates are available, select ‘Download & Install‘. Wait until you get the updates.
- Once done, restart your device to apply these updates to the OS.
3. Create a New Windows Admin User Account
If your account doesn’t have administrator permissions or the user account is corrupted, let’s create a new Windows administrator user account:
- Open the Windows Start menu, go to Settings, select Accounts, and navigate to the Family & Other Users section.
- In the Other Users section, click Add someone else to this PC. To set up a local account, select I don’t have this person’s sign-in information, then choose Add a user without a Microsoft account.
- Input the User Name, Password, Password Hint, and Security Questions, then click Next.
- To skip setting a password, simply click Next without entering one.
- The new account will appear in the Other Users section, and you need to grant it admin privileges.
- Return to the Windows Start menu, open Settings, go to Accounts, and select Family & Other Users.
- Choose the newly created account under Other Users, click Change Account Type, and select Administrator from the drop-down menu, then restart your system.
Sign in with the new admin account and launch QuickBooks to check if the ‘QuickBooks requires that you reboot loop’ error is resolved.
4. Suppress QuickBooks Desktop
Suppressing QuickBooks Desktop opens the QuickBooks application without loading the company file. It helps in determining whether the issue is with QuickBooks or the company file.
- Press the Ctrl key and keep it hold, then double-click on the QB Desktop icon.
Important Note: Don’t release the Ctrl key, until the No Company Open window, QuickBooks freezes, or gives you an error.
- Choose a company file, then choose Open.
5. Change your company file name
A lengthy company file with extra characters may be the reason why QuickBooks gets stuck when updating and prompting again. Change the company file name as “Doing business as” name or “Trade Name,” as this is how customers recognize the company.
- Select the Gear icon, then click on Company Settings (or Account and Settings).
- In the left pane, select Company.
- Choose the Pencil icon in the Company name section.
- Ensure to make the required changes. If your company’s legal name is different, select Add legal name.
- Finally, click on Save, then Done.
6. Repair the Hard Disk on your computer
Run the Windows in-built tool, such as the CHKDSK command, to repair the Hard Disk and resolve the QuickBooks requires that you reboot loop when updating:
- Launch the Windows Start menu.
- Type Run in the search field and press Enter.
- Open the Command prompt and type cmd in the search box.
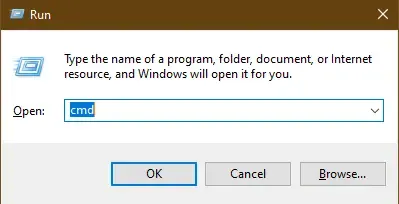
- Now, click OK.
- In the search results, right-click on cmd.exe and select Run as Administrator.
- Type CHKDSK /f, then press Enter.
7. Rename the QBWUSER.INI file
If the QBWUSER.INI file is damaged or missing in QuickBooks, you must consider renaming it to resolve the issues.
| Note: Renaming the QBWUSER.INI file, automatically erases the company files you opened previously. Once done, you will need to re-open your company file manually. |
Here’s how to rename the file:
- Locate to the folder where the QBWUSER.ini file is saved: Users[Your user name]AppDataLocalIntuitQuickBooks [year]
- If you can’t find the folder, you must enable the hidden files and folders.
- Right-click on the QBWUSER.ini file, then select Rename.
- Now, add .OLD extension at the end of the file name such as QBWUSER.ini.old.
- Name the EntitlementDataStore.ecml file again.
- Once done, launch QuickBooks Desktop.
If the program opens after renaming either QBWUSER.ini or EntitlementDataStore.ecml, try opening a sample company file to see where the issues lie.
If the sample company file opens but not the primary one, copy the data file to a different folder. Open the file to a new location. If possible, the issue may be related to the damaged folder or incorrect folder permissions.
If you still fail to sign in to your company file, it is most likely damaged. Try to restore an earlier backup of the same file instead.
If you can’t open the sample company file or QuickBooks won’t start, it means the software installation is damaged and you must repair it.
8. Edit the security permissions in the Windows Temp folder
Incorrect security permissions in the Temp folder might prevent QuickBooks from finishing the update and prompt you to reboot the computer again. Edit these in the Windows Temp folder by following these steps:
- Press the Windows logo key to launch the Windows Start menu.
- Type %temp% and press Enter. This will open the Windows TEMP folder.
- Go to Properties.
- Move to the Security tab in the Properties window and click Edit.
- Now, highlight the Windows username and put a check mark on Full Control.
- Finally, click OK twice and then reinstall QuickBooks Desktop.
9. Manually repair the Microsoft .NET Framework
When a damaged or corrupted Microsoft .NET Framework interacts with a QuickBooks update, it may cause the installation to fail and require a reboot to complete the installation.
Let’s repair these Windows components by following these steps, which are only applicable to Windows 10 or newer:
- Exit all the open programs.
- Launch the Windows Start menu.
- Type Control Panel in the search and press Enter.
- Navigate to Programs and Features.
- Hit on Uninstall a Program. Do not worry, as we are uninstalling anything.
- Select Turn Windows features on or off.
- Now, choose .NET Framework on the list.
- Review the settings for both .NET Framework 4.5 (or later) and .NET Framework 3.5 SP1 in the below steps.
Note: The steps to fix the .NET Framework 4.5, 4.6, 4.7, and 4.8 are the same.
a. Check NET Framework 4.5 (or later)
If you haven’t marked the .NET Framework 4.5 (or later) checkbox:
- Mark the .NET Framework 4.5 (or later) checkbox to enable it.
- Click OK to save the changes.
- Now, restart your computer.
If you already checked the .NET Framework 4.5 (or later) checkbox:
- Mark the .NET Framework 4.5 (or later) checkbox to turn it off. Don’t turn it back on.
- Save the changes by clicking OK.
- Restart your computer.
- Sign in back to the Windows, then follow the steps to enable .NET Framework 4.5 again.
b. Check NET Framework 3.5 SP1
If the .NET Framework 3.5 SP1 checkbox isn’t marked:
- Mark the .NET Framework 3.5 SP1 checkbox to turn it on.
- Save the changes by clicking OK.
- Now, restart your computer.
If you have already selected .NET Framework 3.5 SP1 checkbox:
- Mark the .NET Framework 3.5 SP1 checkbox to turn it off. Don’t turn it back on.
- Save the changes by clicking OK.
- Restart your computer.
- Once signed back into Windows, follow the same steps to turn the .NET Framework 3.5 SP1 on again.
when encounter further error while turning .NET Framework on or off, you must reach out to an IT or Microsoft professional. The issue might be related to the operating system not your QuickBooks.
10. Configure the Windows Firewall for QuickBooks
When installing QuickBooks, you might encounter a message that says, “QuickBooks requires that you reboot your computer to complete the installation.” This is often related to how security features like Windows Firewall and your antivirus software interact with the program.
To prevent these conflicts, you’ll need to create exceptions in your Windows Firewall and antivirus settings. By creating these exceptions, you’re telling your security software to allow QuickBooks to operate without interruption, which will help ensure the program can install and run properly after you restart your computer.
11. Repair QuickBooks Desktop
Let’s repair the QuickBooks installation or the software itself using the different utilities in QuickBooks Tool Hub:
Note: Ensure you download and install the latest release of QuickBooks Tool Hub. For a better experience, it is recommended to use the Tool Hub on Windows 10, 64-bit.
a. Run the QuickBooks Install Diagnostic tool
The Quick Fix my Program will automatically shut down any processes running in the background. It will also run a quick repair on the program.
- Select Program Problems in the QB Tool Hub.
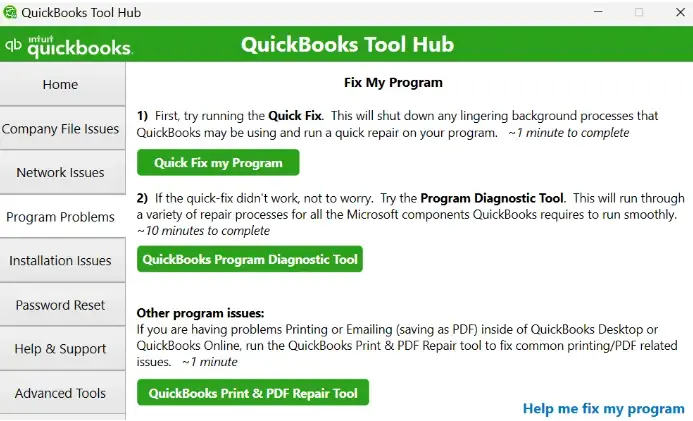
- Hit on Quick Fix my Program.
- Launch QB Desktop and open your company file.
b. Run Quick Fix my Program
If something went wrong during the QuickBooks install, it could cause problems when you try to use it. Run the QuickBooks Install Diagnostic Tool to fix common install issues.
- Open the QuickBooks Tool Hub.
- Hit on Installation Issues in the left pane.
- Select the QuickBooks Install Diagnostic Tool button. The tool may take up to 20 minutes to finish the process; wait until then.
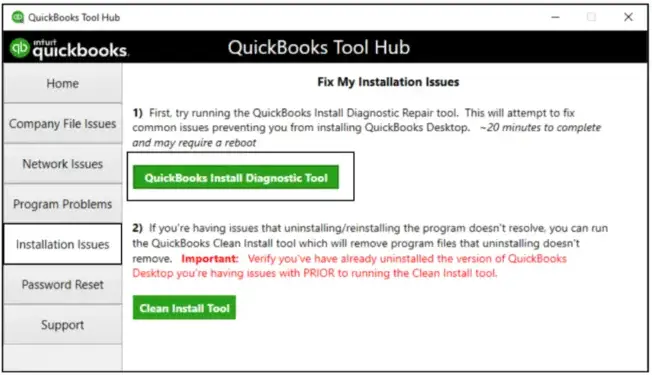
- Once done, restart your computer and then launch QuickBooks Desktop. Next, open the company file.
- Ensure QuickBooks is up to date to receive the most recent fixes and security updates.
12. Install QuickBooks in Selective Startup
Reinstalling QuickBooks Desktop in selective startup mode is a common troubleshooting step for resolving the QuickBooks update keeps asking to reboot error because it addresses the underlying interference from other programs.
When you start your computer in selective startup, it loads only the essential Windows services and programs. This prevents other applications, like antivirus software or background processes, from interfering with the QuickBooks installation or update.
a. Switch to Selective Startup
- Launch the Run command on your computer.
- Type msconfig in the search bar and click OK.
- Go to the General tab.
- Choose Selective startup, then Load system services.
- Move to the Services tab and click on Hide all Microsoft Services.
- Now, click on Disable all.
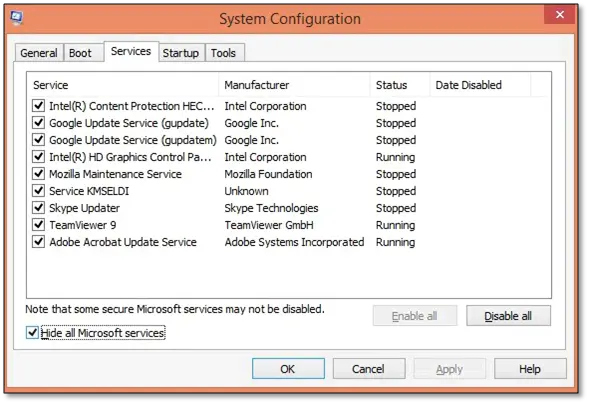
- Uncheck Hide all Microsoft services below the services.
- Click OK.
- On the prompted System Configuration window, select Restart.
b. Reinstall QuickBooks QuickBooks
Reinstalling QuickBooks Desktop is a way to refresh the program’s files to resolve technical issues without affecting your valuable financial data, provided you have properly backed up your company file beforehand. Carefully delete the QuickBooks Desktop files using the Control Panel and then reinstall the program.
c. Switch back to the Normal mode
- Launch the Run command by pressing the Windows+R keys.
- In the Run prompt, type msconfig and click OK.
- Go to the General tab, then choose Normal startup.
- Click OK.
- Select Restart on the System Configuration window.
Conclusion
So, this is the end of this blog covering the possible causes, warning messages, and the steps to troubleshoot the ‘QuickBooks requires that you reboot loop’ issue. We hope the information has helped you resolve the update loop, and that the program is now updated to the latest release.
For further assistance, it is recommended to connect with QuickBooks professionals to get the issue resolved. Dial +1(866)409-5111 to talk to an expert today!
Frequently Asked Questions
Does QuickBooks update require restart?
Yes, a computer restart is often required to complete the update installation for both QuickBooks Desktop and Online versions. This allows for the proper application of changes and can prevent errors or a “reboot loop” if the process is interrupted.
Where is QBWuser.ini located?
The QBWuser.ini file is typically located in the C:Users[Your user name]AppDataLocalIntuitQuickBooks [year] folder. It may be in a hidden folder, so you may need to enable “Show hidden files” in your File Explorer settings to find it.
Why am I stuck in loop to update QuickBooks?
You may be stuck in a QuickBooks update loop due to various factors, including an outdated Windows OS, a lengthy company file name, a damaged hard drive, a corrupted or missing QBWUSER.INI file, or issues with security permissions in the Windows Temp folder. Try resolving these issues; if they don’t work, consult a detailed article or seek professional help.
How do I bypass QuickBooks forced update?
To bypass a QuickBooks forced update, you can end the update processes from the Task Manager, delete the downloaded update file to stop the installation, and disable write permissions for the update folder.
How to restart QuickBooks Desktop after update?
To restart QuickBooks Desktop after an update, first close the program, then restart your computer. Finally, reopen QuickBooks to complete the installation. You might see a prompt asking for permission to apply changes; click “Yes” and then restart your computer again for the changes to take effect.

