QuickBooks Error 6000 77: Fixing the Company File Error
Hosting a company file on the network enables you to share it with your team for collaboration and simultaneous work on the data file. However, if the hosting settings are not configured properly or the file path is incorrect, you may be unable to access the company file on the network and encounter QuickBooks error 6000 77, accompanied by a warning message:
“We’re sorry. QuickBooks encountered a problem. Error codes: (-6000, -77).”
This error is one of the 6000 series errors, which indicate ongoing problems in your system or incorrect settings when trying to open the company file. To resolve this issue, you must identify the root causes and resolve them systematically. Follow this detailed guide to understand the problems and troubleshoot them step-by-step.
Why QB Company File Won’t Open and Shows Error Code 6000 77?
QuickBooks error 6000 77 appears mainly due to incorrect hosting settings or due to some kind of damage or corruption in the file. There could other possible reasons as well which we cover below in detail:
- Not using the latest version of QuickBooks
- Incorrect hosting settings or general network issues
- Possible damage or corruption to your company file
- The .ND or .TLG configuration file may be damaged or corrupt
- The shared download drive may not be mapped
- Multiple company file locations or incorrect paths
- QuickBooks processes running in the background may be causing problems
- Damaged company file folder
- Not having sufficient Windows access permissions to share the file
- Windows firewall may be blocking QuickBooks desktop and processes
How to Fix QuickBooks Error 6000 77 When Opening Company File?
Now, let’s explore the suitable methods that will help you get past error code 6000 77 when opening company file and continue with the file-related processes in QuickBooks Desktop:
1. Update QuickBooks Desktop
Update version of QuickBooks Desktop is necessary to ensure that you are using the latest software features and security patches. This way, the system will not be vulnerable to security threats, and this update also includes a bug fix for seamless financial management with QuickBooks.
2. Run QuickBooks File Doctor
The QuickBooks File Doctor is a utility in the QB Tool Hub that verifies the company file for possible damage and network connectivity issues, then runs a quick repair to resolve them. Before getting started, ensure that you have downloaded the QB Tool Hub in the latest available version.
- Launch QB Tool Hub on your computer.
- Select Company File Issues from the left menu bar.
- Hit on Run QuickBooks File Doctor. The tool can take up to one minute or more to open the file doctor.
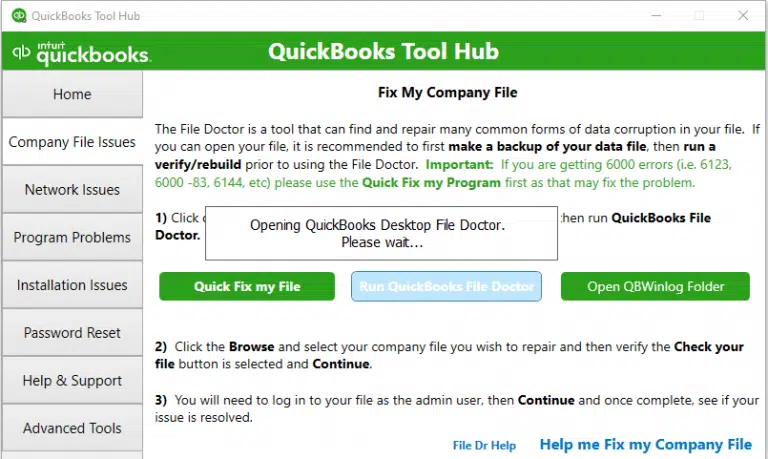
Note: If the QB File Doctor fails to open, search for QuickBooks Desktop File Doc and open it manually.
- Now, choose your company file from the drop-down menu in the File Doctor. If you can’t see your company file, click on Browse and look for your company file.
- Hit on Check your file (middle option only) and then Continue.
- Enter the QB admin password to allow the access and click Next.
If you still encounter any issues when running QB File Doctor, proceed to the next solution.
3. Check if Hosting is on for all workstations
It is recommended to use the server computer for your company files, rather than the workstations.
- Press F2 to launch the Product Information window.
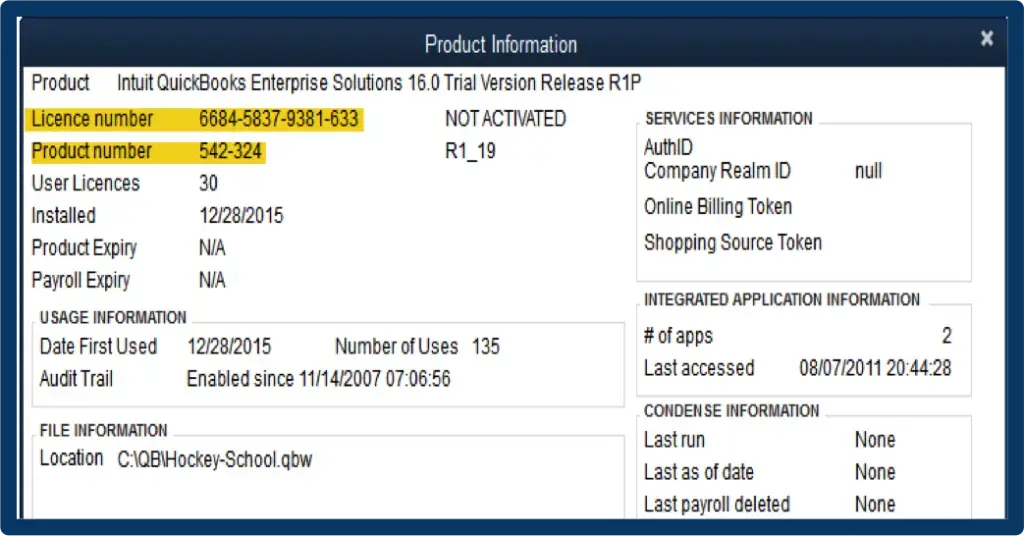
- Check the Local Server Information. Now, make sure the Hosting is turned off on the workstations.
Read More- QuickBooks Multi User Mode Not Working
4. Rename .ND and .TLG files
.ND and .TLG are the configuration files that enable QuickBooks Desktop to open a company file in network or multi-user mode. Possible damage or corruption to these files can cause errors when opening QuickBooks Desktop and the company file.
Renaming these files will replace them with the new ones when you open the company file or scan using the QuickBooks Database Server Manager, addressing all the associated issues.
Follow the steps below to learn how to rename .ND and .TLG files in QuickBooks:
- Open the folder where your QuickBooks file is saved.
Default Location: C:\Users\Public\Public Documents\Intuit\QuickBooks\Company Files
- Look for the files with the same name as your company file but with the .ND and .TLG extensions at the end.
Example: company_file.qbw.nd, company_file.qbw.tlg
- Right-click on the .ND and .TLG files and select Rename. Now, add the .OLD after the file extension and press Enter.
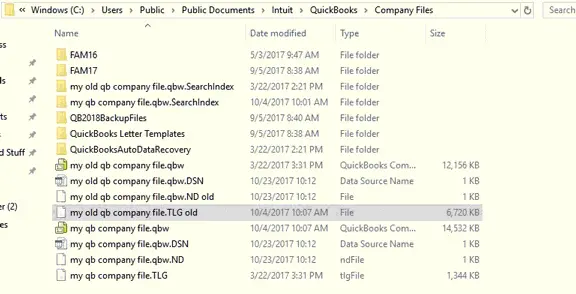
Example: company_file.qbw.nd.OLD, company_file.qbw.tlg.OLD.
5. Use a UNC path instead of a mapped drive
Switching to a UNC path (Universal Naming Convention) bypasses the mapped drives and refers to the server location directly, potentially resolving the issue
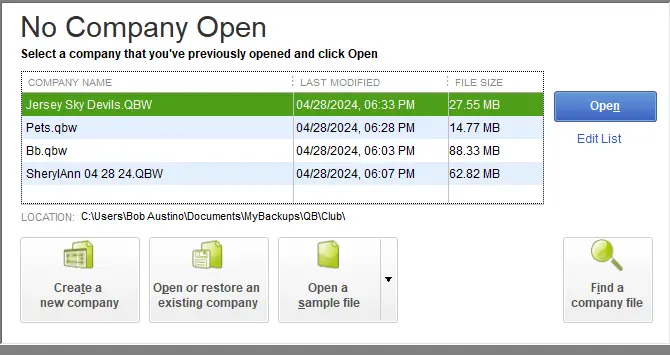
- Right-click on your QuickBooks Desktop and press and hold the Ctrl key on your keyboard. Now, select Run as Administrator. Keep the Ctrl key presses until the No Company Open window appears.
Note: Holding down the Ctrl key prevents QuickBooks Desktop to automatically open the company file
- Navigate to the File menu and select Open or Restore Company.
- Select Open a company file, then Next.
- In the left pane, select Network and go to your company file location.
Note: If you can’t find the folder where the company file is saved, you may need to set folder permissions.
- Choose the company file and select Open.
6. Copy the QuickBooks file to the Desktop
When you copy your company file to your desktop and try to open it, it will test whether the problem is in the company file or the folder.
- If the data file opens from the desktop, it shows the damages to your location you save the file to.
- If the file opens from the desktop, it means there are damages to your location where you save the file.
- The file might in too many folders and exceeds the limit of the file system path, leading to failure to access it.
- If you still fail to open the file after changing the location, the data file might be damages or corrupted.
- Open the QuickBooks company file folder.
- Look for the file with .QBW extension.
- Now, right-click on it and select Copy. Move to your desktop, right-click anywhere on your desktop and select Paste.
- Press and hold the Ctrl key, then open QuickBooks. This will open the No Company Open window on your screen.
- Hit on Open or restore an existing company, then move to your desktop and look for the company file to open.
7. Close all QuickBooks processes
QuickBooks processes active in the background can interfere with processes running in the background such as opening a company account and generate QuickBooks error 6000 77. Let’s eliminate these processes for a better experience:
- On your server computer, sign in to QuickBooks with all the admin rights.
- Launch the Task Manager by pressing Ctrl+Shift+Esc.
- Now, show processes for all users and select Users.
- Choose each QuickBooks processes (QBW32.EXE, qbupdate.exe, and QBDBMgr.exe), then End Task.
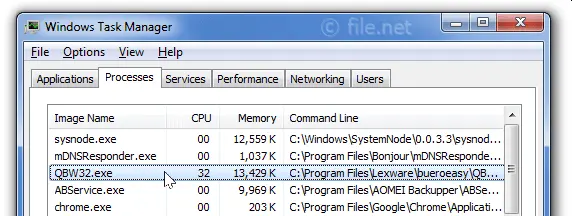
- Try opening company file in the multi-user mode.
8. Set Windows access permissions to share company files
The Windows access permissions are necessary to share the company file over the network; otherwise, you will get QuickBooks error 6000 77. Let’s learn how to configure these permissions:
a. Set up folder permissions
Verify that permissions are set correctly
- Launch the Windows Start menu on your computer.
- Right-click on the folder that contains your company file, then select Properties.
- Go to the Security tab and select Advanced.
- Choose the QBDataServiceUserXX and click Edit.
- Now, configure the following settings to Allowed:
- Traverse Folder/Execute File
- List Folder/Read Data
- Read Attributes
- Read Extended Attributes
- Create Files/Write Data
- Create Folders/Append Data
- Write Attributes
- Write Extended Attributes
- Read Permissions
if the file permissions aren’t set correctly:
- Right-click on your QuickBooks file folder and select Properties.
- Go to the Security tab and click Edit.
- Now, select QBDataServiceUserXX and choose Full Control, then Allow.
- Finally, select Apply, then OK.
Change folder permissions
- Launch the Windows Start menu.
- Type File Explorer in the search field and press Enter.
- Find and right-click on the below folders:
- C:\Program Data\Intuit\Entitlement Client\v8
- C:\Program Data\Intuit\Entitlement Client\v6.0
- C:\Program Data\Intuit\Entitlement Client\v5
- C:\Program Data\Intuit\Entitlement Client\v3
- C:\Program Data\Intuit\Entitlement Client
- C:\Program Data\Intuit\QuickBooks Enterprise Solutions X.0 (X = version) or C:\Program Data\Intuit\QuickBooks 20XX (XX = year)
- C:\Program Data\COMMON FILES\INTUIT
- C:\Program Data\COMMON FILES\INTUIT\QUICKBOOKS
- C:\Users\Public\Public Documents\Intuit\QuickBooks\FAMXX (XX = year)
- C:\Users\Public\Public Documents\Intuit\QuickBooks\Company Files
- C:\Users\Public\Public Documents\Intuit\QuickBooks\Sample Company Files\QuickBooks Enterprise Solutions X.0 (X = version) or C:\Users\Public\Public Documents\Intuit\QuickBooks\Sample Company Files\QuickBooks 20XX (XX = year)
Perform the below steps for the listed folders. Remember that you may not find all the folders on your system as some are specific to certain versions of QuickBooks Desktop.
- Right-click on the folder and then choose Properties.
- Move to the Security tab and select Everyone.
Note: If Everyone is not listed in the Group or User Name checkbox, select Add and type in Everyone. Then select OK.
- Now, choose Full Control, then click Apply and OK.
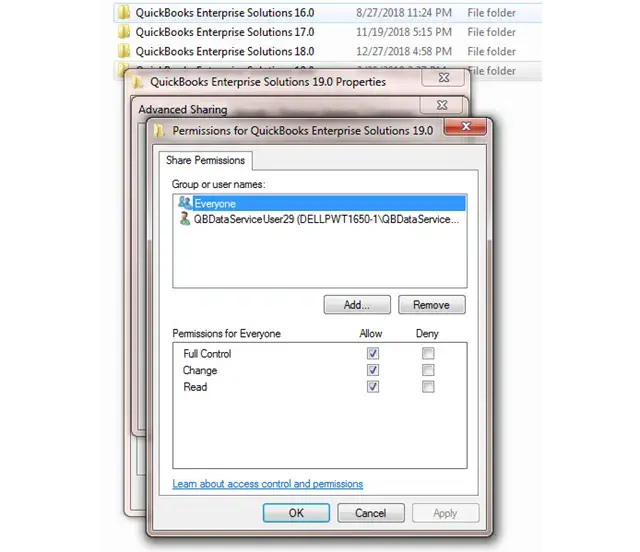
b. Set Windows access permissions to share company files
Make sure QuickBooks have the proper level of permissions to access the company file and prevent the future issues over the network.
Note: The steps are applicable for Windows 10 or the newer version.
- On your computer, launch the Windows Start menu.
- Search for File Explorer in the search field and press Enter.
- Locate the company file folder and right-click on it.
- Choose Properties, then click on Sharing and then Share Add.
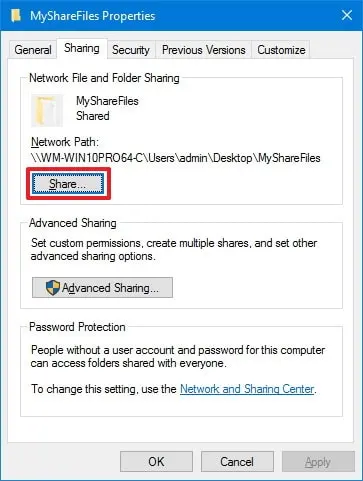
- Choose the corresponding version of QBDataServiceUserXX.
- Finally, configure the permission level of both users to Full Control and select Share.
9. Recreate the damaged folder
Let’s replace the damaged company file folder with the new one by following the steps below:
- On your C: drive, create a new folder.
- Locate the folder where the company file is saved.
- Now, open the .qbw file.
Example: company_file.qbw
- Now, right-click on the .qbw and select Copy.
- Open the new folder you created and Paste the company file.
- Make sure the Windows access permissions are set correctly to share the company files.
- Launch QuickBooks Desktop and then open your company file using the new location.
10. Configure the Windows Firewall settings
Windows Firewall is a system security application that usually controls the system ports for incoming and outgoing data. If it considers the data a threat to your computer, it may block the execution of such actions or the associated operations. The same applies to all the applications you run on the system, which may be the reason why Windows Firewall is blocking QuickBooks.
To resolve this, ensure that you create Windows Firewall exceptions for QuickBooks Desktop and open your company file without encountering any errors.
Conclusion
We all know how important the company file is in QuickBooks Desktop, as it stores all the business and financial data. Failing to open the company file can cause permanent data loss and disrupt normal business operations.
The information above will help you identify the root cause and resolve QuickBooks error 6000 77 immediately. For further assistance, we recommend contacting QuickBooks experts.
Frequently Asked Questions
Error 6000 is a series of errors that start with 6000 and vary to different numbers. Mainly, the error appears when opening the company file on the network or locally. This typically occurs due to incorrect hosting settings, insufficient permissions to access the company file, or an incorrect path to the data file. Moreover, issues with the Windows Firewall or network connectivity may also trigger the error.
Your QuickBooks Desktop may crash when opening a company file due to various reasons, including issues with the company file itself, incorrect QuickBooks installation, or problems with the system environment. Moreover, not using an up-to-date version of QuickBooks, Windows Firewall, or antivirus software, as well as problems with QB Database Server Manager, may also cause such issues.
To repair a company file in QuickBooks Desktop, ensure that you run the Verify and Rebuild Data utility, which verifies potential damages and performs a quick rebuild. If this doesn’t resolve the issues, consider running the QuickBooks File Doctor utility to ensure the data in the company file is accurate and that there are no network issues causing problems or conflicts.
QuickBooks cannot be downloaded as the tool has been merged with QB Tool Hub and the standalone version has been discontinued. To access the tool, download and install the QB Tool Hub. Then, go to the Company File Issues tab and select ‘Run QuickBooks File Doctor‘ to repair company file and network issues.
To backup your company file in QuickBooks Desktop, go to the File menu> Back Up Company> Create Local Backup. Now, select Local Backup> Next. Choose the location to save the backup copy such as the file folder or flash drive, then click on Save it Now and Next. You can also setup the automatic backup.

