Learn How to Troubleshoot QuickBooks Error 179 in No Time
QuickBooks error 179 is a common banking error that disrupts connectivity between QuickBooks and your bank’s website, preventing access to account data. Users may encounter warnings like “Unable to connect to your bank’s website” or “Error 179.”
Key causes include multiple simultaneous logins, outdated login credentials, corrupted browser cache, or issues with the bank’s server. This error can halt transaction downloads and reconciliations, impacting financial management. Prompt resolution is crucial to restore seamless accounting. In this blog, we’ll explore effective solutions to fix Error 179 and ensure smooth QuickBooks operations.
What Causes Bank Error 179 in QuickBooks Online?
Your bank connection or the attempt to login can be hampered due to various reasons. Let us explore all the possible factors why see QuickBooks error 179 when logging in
- Intuit might not be a trusted site in your browser
- Excessively stored cookies and caches to your browser
- Possible browser download errors and issues can hamper the usual activity
- Incorrect bank login credentials
- Not updating any changes to the bank login details
- The Windows registry might be damaged or corrupted
Learn How to Troubleshoot QuickBooks Error 179 in No Time
Now that you know the factors that cause the error, taking the appropriate steps will help you instantly resolve bank login error 179 in QB Online. The section below explains various ways to resolve the error and ensure that you can log in to your bank.
1. Add Intuit as a trusted site
Adding Intuit as a trusted site can prevent the browser from blocking your site content or bank when logging in. Your website must be added to the trusted site to verify authentication and ensure the system is secure and protected.
Google Chrome
- In your Google Chrome, select the Customize and control Google Chrome ⋮ icon
- Choose Settings from the options.
- Click on Privacy and security from the left pane and select Third-party cookies.

- Next to Allowed to use third-party cookies, choose Add.
- Now, type intuit.com, then select Add to save.
Safari
- Launch the Safari browser.
- Type intuit.com and press Enter.
- Choose Bookmarks, then select Add Bookmark…
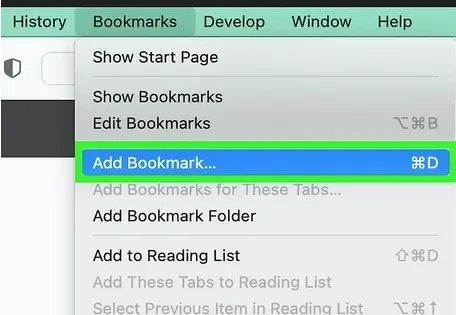
- Select Favorites under Add this page to: drop-down.
- Finally, click Add to save the changes.
Microsoft Edge
- Select the Settings and more … icon in Microsoft Edge.
- Now, click on Settings.
- Choose Cookies and site permissions in the left pane, then select Manage and delete cookies and site data.
- In the Allow section, choose Add.
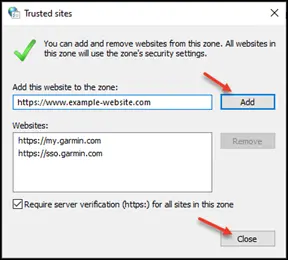
- Type intuit.com, then select Add to save.
2. Clear the browser’s cookies and caches
Excessively stored cookies and caches can cause issues when logging into your bank and may also interrupt other browser-related processes.
Cookies and caches are used to enhance a user’s experience and load the website faster for subsequent visits. But they expire after a certain period. Make sure to clear the browser’s cookies and caches, as well as Intuit-specific ones, which can be responsible for QuickBooks error 179.
You may also read- Fixing Browser Issues in QuickBooks
a. Clear your browser’s cache
Choose the browser you use and follow the steps to clear cookies and cache:
Firefox
- Select the Menu button.
- From the drop-down menu, click on Settings.
- Navigate to the Privacy & Security panel.
- In the Cookies and Site Data section, select Clear Data.
- You will be redirected to the Clear browsing data and cookies window.
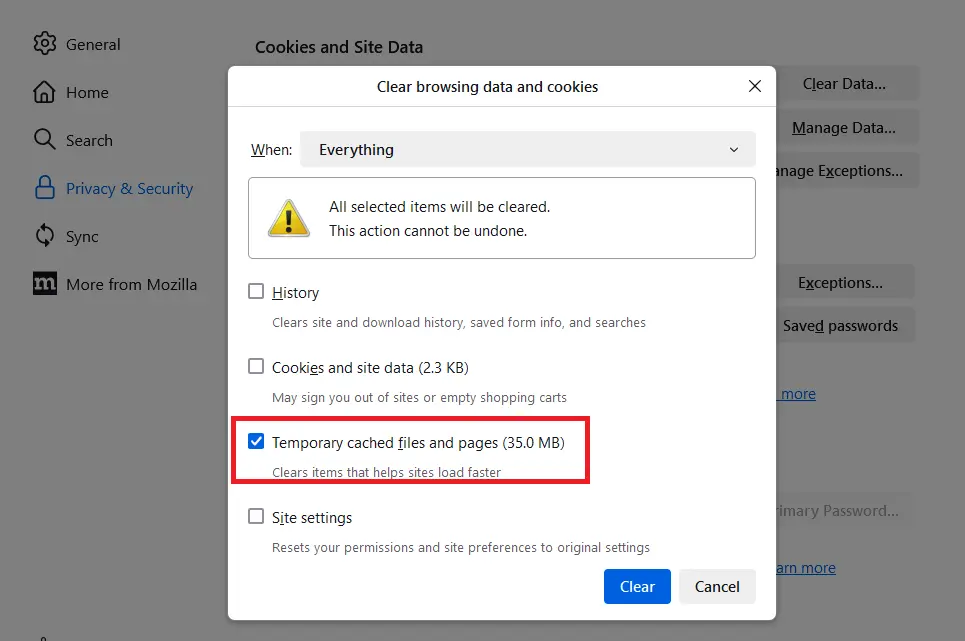
- Choose Everything from the drop-down next to When:, and make sure to mark the Temporary cached files and pages checkbox.
- Click on the Clear button.
- Close the Settings page. This will save all the changes automatically.
Google Chrome
- Launch Google Chrome on the browser.
- Go to More at the top and select Delete browsing data.
- Choose the specific time range to clear the data, such as Last hour or All time.
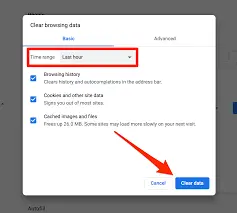
- Select the information you want to clear.
- Now, click on Delete Data.
- Make sure to remove cookies while using Chrome. This way you won’t logged out of the browser.
Safari for Mac
- On your Mac, launch the Safari app.
- Go to History and select Clear History.
- Now, click on the pop-up menu appears on the screen.
- Choose the specific date to clear the browsing data.

Safari for iPad and iPhone
- Select Settings at the top menu bar.
- Go to Apps, then click on Safari.
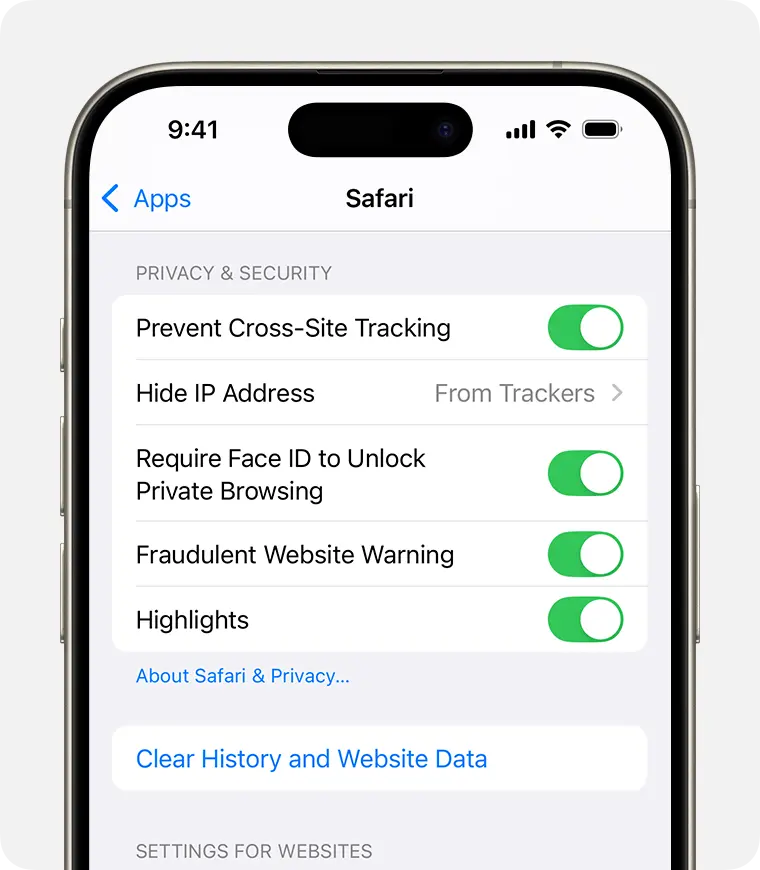
- Hit on the Clear History and Website Data.
Deleting browsing data, cookies, and history in Safari won’t affect your AutoFill information. The clear button grays out if there’s no history or web-page data to delete. It may also appear gray if web content restrictions are enabled in Screen Time’s Content & Privacy settings.
Microsoft Edge
- In Microsoft Edge, click Settings and more.

- Go to Settings, then select Privacy, search, and services.
- Under Delete browsing data, click Clear browsing data now and choose the data to clear.
- Select a time range from the Time range drop-down menu.
- Pick the browsing data types to delete, such as cookies and browsing history, while keeping form data and passwords.
- Click Clear now.
- Restart your browser after clearing cookies and cache.
b. Clear Intuit-specific cookies from your browser
Whichever browser you use, proceed with it and clear Intuit-specific cookies to ensure all related processes function smoothly:
Google Chrome
- Select the More ⋮ icon from the top of your browser.
- Go to Settings, then click on Privacy and security.
- Hit on Cookies and other site data.
- Now, choose See all cookies and site data.
- In the search field, type Intuit to find the Intuit specific cookies.
- Click on Remove all shown or the trash can icon.
- Restart your browser to apply the changes.
Mozilla Firefox
- Select the Menu ☰ icon from the top right corner.
- Choose Settings, then click on Privacy & Security.
- Click on Manage Data under Cookies and Site Data.
- In the search field, type Intuit and press Enter to find the Intuit specific cookies.
- Hit on Remove All Shown.
- Now, select Save Changes.
- Once done, restart Mozilla Firefox for the changes to take effect.
Safari
- Launch the Safari browser.
- Choose Safari beside the apple icon to the top left.
- Hit on Preferences or Settings.
- Select Privacy, then click on Manage Website Data.
- Find the Intuit specific cookies by typing Intuit in the search bar.
- Click on Remove All.
- Select Remove Now, then Done.
- Finally, restart Safari for the changes to take effect.
3. Open bank in the private window
When you open the bank in a private window, it bypasses cached data and potential conflicts from your regular browser session and ensures that you can log in to your bank, avoiding potential errors and issues.
a. Firefox
- Windows: Shift + CTRL + P
- Mac: Shift + ⌘ + P
b. Google Chrome
- Windows: Ctrl + Shift + N
- Mac: Cmd + Shift + N
c. Safari for Mac
Open the private window: Command + Shift + N
d. Safari for iPad and iPhone
- Launch the Safari app.
- Select the Tabs button.
- Finally, click on Private.
4. Troubleshoot the browser’s download issues
If you’re facing issues downloading or locating a downloaded file, try these steps:
- Press Ctrl+J in your browser to view downloads.
If this fails, change the default download location by following the specific instructions for your browser type.
- For Google Chrome
- Click the menu (three dots) on Chrome’s toolbar, then choose Settings.
- Go to Downloads:
- Click Change to set a default save location for downloaded files.
- Enable Ask where to save each file before downloading to select a specific location for each download.
- For Mozilla Firefox
- Click the menu (three lines) on Firefox’s toolbar, then select Settings.
Navigate to the General tab:- Click Choose… under Files and Applications to modify the default download location.
- Select Always ask me where to save files to choose a specific location for each download.
- For Safari
- Click Safari, then choose Settings… from the menu bar.
- In the General tab, use the dropdown next to File download location.
– Choose Ask for Each Download or select Other… to set a default save location for all downloads.
- For Microsoft Edge
- Click the three dots in the top-right corner, then select Settings.
- Go to the Downloads tab:
- Click Change to set a default save location for downloaded files.
- Enable Ask me what to do with each download to choose a specific location for each download.
5. Verify the Banking Login Credentials
Incorrect banking login credentials can trigger QuickBooks error 179. Make the credentials are correct or you can reset the login password to login to your bank:
- Open your web browser and navigate to your bank’s online login page.
- Sign in by entering your banking login credentials.
- If you successfully access your account, proceed to update the credentials to resolve QuickBooks Desktop error 179.
- If the credentials are incorrect, reset your QuickBooks password.
6. Update Banking Login Credentials in QuickBooks
Updating to the correct username and password, QuickBooks can re-establish a proper connection with the bank, resolving the error. Let us learn how to update the info by following the below steps:
- Launch QuickBooks Online and select the Banking option from the left Banking Panel.
- Choose the account showing error code 179 and click the Edit icon.
- Select Edit Sign-in Info, input your latest online banking login details.
- Finally, click Update and attempt to reconnect your account again.
Note: If QuickBooks error 179 persists after these steps, wait at least 20 minutes before retrying. Meanwhile, you can update transactions and bank feeds by downloading them from your bank’s website and manually uploading them into QuickBooks.
Read More- Step by Step Guide to Writing System Registry Values
7. Repair Windows Registry
The sfc /scannow command in Windows scans and repairs corrupted or missing system files to ensure proper system functionality. It verifies the integrity of protected system files and replaces faulty versions with correct Microsoft ones as needed.
- Press Windows+X to open the Quick Link menu.
- Select Command Prompt (Admin) or Windows PowerShell (Admin) from the options.
- Confirm the User Account Control (UAC) prompt by clicking Yes.
- Enter sfc /scannow in the command window and press Enter.
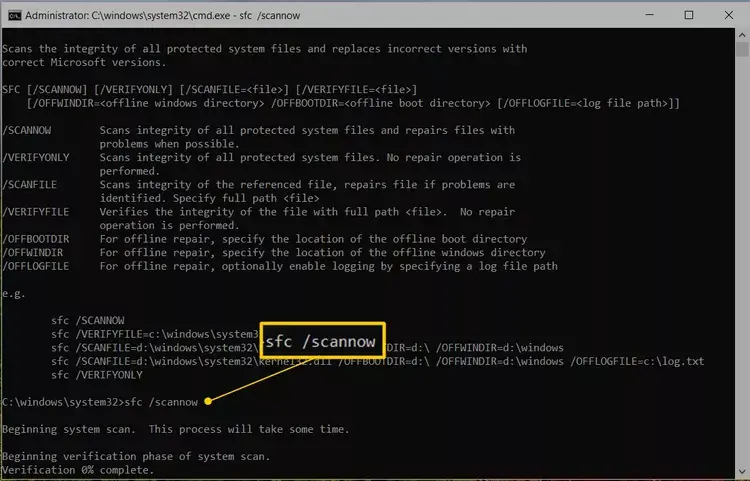
- The tool will automatically scan and fix Windows system file issues.
- Restart your computer after the process completes.
Conclusion
In conclusion, we’ve explored the key causes behind QuickBooks error 179, which can disrupt your bank connection, along with expert-recommended troubleshooting steps to resolve it. These solutions are crafted to restore seamless functionality, but they may not resolve every scenario. For persistent issues or tailored guidance, reach out to a QuickBooks ProAdvisor by calling the toll-free support number today!
Ensure your financial operations run smoothly with professional assistance.
Frequently Asked Questions
QuickBooks Error 179 means your bank’s website is rejecting your login attempt in QuickBooks Online. This usually happens because the bank thinks you’re already logged in elsewhere, often due to a previous session not closing properly. It stops you from accessing your bank account data in QuickBooks.
To fix QuickBooks login problems, first check that your username and password are correct and Caps Lock is off. If you still can’t log in, clear your browser’s cache and cookies or switch to another supported browser, as old data or extensions might cause issues.
QuickBooks login issues may arise from wrong credentials, browser problems, or software glitches. To fix them, check your username and password, clear your browser’s cache, try another browser or device, and confirm you have a reliable internet connection.
To manually add a bank account in QuickBooks, go to the Chart of Accounts, select “New,” choose “Bank” as the account type, and then enter the required information such as the account name, statement type, and currency. You can also optionally add the account number, routing number, and opening balance.
To activate a bank account in QuickBooks Desktop, you’ll need to connect it to the software’s banking feature. This requires you to go to the “Banking” or “Transactions” menu, choose “Bank Feeds,” and then select “Connect Account.” You’ll then need to find your bank, enter your online banking credentials, and select the specific account you want to link.

